Regular releases
Push to production happens in regular batches. Usually every second week, starting on Wednesday (testing on staging) and final deployment to production on Thursday.
Current administrators that perform regular releases are:
Release schedule is published in Release Services calendar.
Protocol that we follow is:
1. Push to staging channel
A day before pushing to production (usually on Wednesday morning), we push release services code to staging channel.
To trigger automatic deployment of all project to staging channel you need to
force push from master to staging branch.
git clone git@github.com:mozilla/release-services.git
cd release-services
git push -f origin origin/master:staging
2. Close staging branch
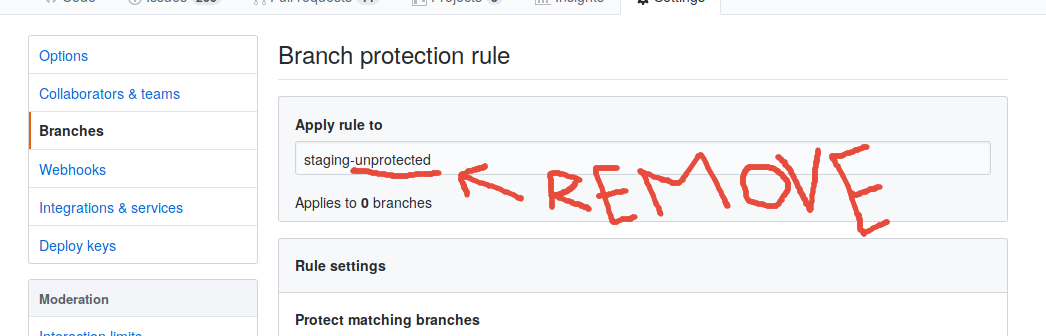
Once the code you wish to deploy to production is pushed to staging branch, you need to make sure nobody else can push to staging branch.
To do this you need to go to Github and mark staging branch as protected, by removing -unprotected suffix as shown bellow.
3. Verify if projects are working on staging
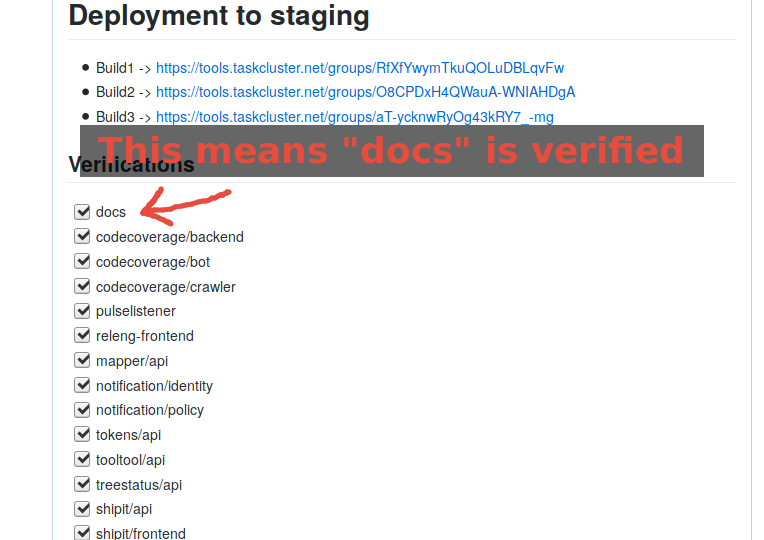
Before we push to production, we verify that projects are working on staging.
Each project is verified and reported back to the tracking Pull Request of the release. This Pull Request is usually open by the end of previous release.
Each project should have a verification guide, which you can follow in their documentation page.
Once you verify that the project works on staging, you must check it off in tracking Pull Request for this deployment, as shown bellow.
The role of the release manager is that it ensures that all projects are verified and tested before deploying to production.
4. Deploy projects to production
To deploy all project to production we need to push respected code to
production branch. We also need to tag the commit with version of the
deployment, which can be found in ./VERSION file.
You can follow below command to help you push correctly.
git clone git@github.com:mozilla/release-services.git
cd release-services
git push origin origin/staging:production
git tag v$(cat ./VERSION) origin/staging
git push origin v$(cat ./VERSION)
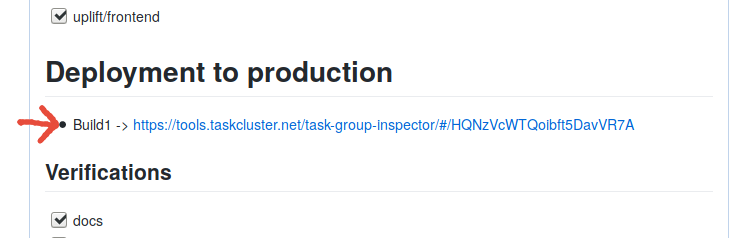
Once deployment starts record the taskcluster graph to the tracking Pull Request of the deployment as shown below.
5. Verify if projects are working on production
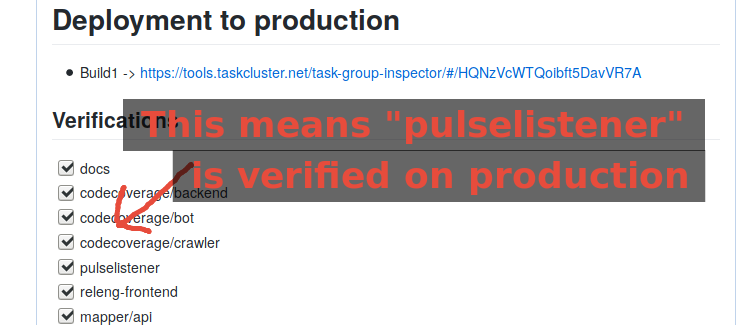
Each project is verified and reported back to the tracking Pull Request of the release. This Pull Request is usually open by the end of previous release.
Each project should have a verification guide, which you can follow in their documentation page.
Once you verify that the project works on production, you must check it off in tracking Pull Request for this deployment, as shown bellow.
The role of the release manager is that it ensures that all projects are verified and tested before deploying to production.
6. Announce that deployment to production is done
An automatic IRC message has been sent by Taskcluster when starting the deployment. You need to announce that deployment to production is now done:
- on
#ciIRC channel.
You can use the following message::
Previously annonced release of mozilla/release-services (*.mozilla-releng.net, *.moz.tools) to productions is now complete. If you see anything behaving weird please let me know.
7. Write the release notes
Create the release notes on GitHub and use tag we created in step 7.
A good starting point for writing release notes is:
git log --oneline v$((($(cat VERSION)) - 1)).. HEAD \
    | cut -d' ' -f2- \
    | sort \
    | grep -v '^Deploying '
8. Push new base image
This step will take some time (~30-60min) also good Internet connection is required.
First we install docker inside our existing base image:
git clone git@github.com:mozilla/release-services.git
cd release-services
./please tools docker-shell
nix-env -f /etc/nix/nixpkgs -iA docker
You now have docker in your Docker shell. But you may not have read access to the Docker socket. To check this, simply type:
docker ps
If you do not see the list of your running containers but a connection error, you need to do the following (in your docker shell, not on your host machine):
sudo addgroup --gid 999 docker
sudo adduser app docker
This will add the current user to the docker group, thus granting him access (after opening another shell to check your new rights !)
In another terminal we apply the PR to bump the version
curl -L https://github.com/mozilla/release-services/pull/<PR_NUMBER>.patch | git am
Back in our docker shell we then build and then push docker image:
./please -vv tools build-base-image \
    --taskcluster-secret="repo:github.com/mozilla-releng/services:branch:production" \
    --taskcluster-client-id="..." \
    --taskcluster-access-token="..."
./please -vv tools push-base-image \
    --taskcluster-secret="repo:github.com/mozilla-releng/services:branch:production" \
    --taskcluster-client-id="..." \
    --taskcluster-access-token="..."
Once base image is pushed to Docker Hub we can merged tracking Pull Request of this deployment. Before that, hit Update branch button to re-trigger Taskcluster builds, which would verify if above created base image is working correctly.
If Taskcluster build for the Pull Request turns out green go ahead and merge it.
9. Bump version and create new deployment PR
All we need to do now is create a new Pull Request and bump the version, which is going to be used next time we do deployment.
git clone git@github.com:mozilla/release-services.git
cd release-services
git checkout -b version-bump origin/master
echo "$((($(cat VERSION)) + 1))" | tee VERSION2
sed -i -e "s|base-$(cat VERSION)|base-$(cat VERSION2)|" .taskcluster.yml
mv VERSION2 VERSION
git commit -a -m "Deploying v$((($(cat VERSION)) - 1)) (and bumping version to v$(cat VERSION))"
git push origin version-bump -f
Now open a Pull Request from version-bump to master branch and copy
title and description from previous tracking Pull Request.